


Sanding how-to in practice
Tips for using different tool types, accessories and abrasives
Over the last few years, renovating old houses and apartments has been in vogue. Most of these buildings date back to the period between 1960 and 1980, meaning there is a lot of work to do – every surface needs to be renovated and the related subsurfaces indoors must be prepared.
Sanding is required when renovating and restoring old structures ‒ in all possible configurations. It's not uncommon for certain parts of the building to remain occupied during a renovation, making clean work with low volumes of generated dust all the more important. Due to the increasing demands that customers place – with regard to the quality, durability and sustainability of the surface and materials – the requirements for painting businesses are also increasing. Ultimately, a surface is only ever as good as the preparation of the subsurface. To meet these demands, the ideal subsurface preparation and professional sanding are gaining increasing importance. In this article, the sanding experts at Festool explain how this is interpreted in practice. "With all sanding work, a harmonised sanding system is key to quality and working progress," explains Dino Frey, painter and trainer at Festool. Painting businesses usually encounter these sanding requirements: Sanding off unsound old coats, or those that are incompatible with new coats, adapting and smoothing surfaces and removing unevenness, as well as intermediate sanding of layers of repair compound. A harmonised sanding system helps to complete these tasks to a suitable standard. It consists of the ideal abrasive paper for the sanding requirement in question, the right sanding pad and the compatible sander in combination with the optimum dust extraction system. With sanding systems that can be combined in a variety of ways, everyday work becomes more effective, delivers the required result more quickly and is also more healthy ‒ for employees of the painting business as well as for the customer, who often remains living in a separate area of the building during the painting work. For every requirement there is an individual solution. You just have to know the best way to use it.
Many sanders – which one to choose?
"There is no single, universal sander – the same is true when renovating. It always depends on the main requirements to be met," says Dino Frey. For example, is a high material removal capacity required, or a particularly fine sanding finish? Or do large wall and ceiling surfaces have to be sanded right into the smallest corners? There are specific sanders for every task: Long-reach sanders in various configurations, numerous eccentric sanders with different sanding strokes, rotary sanders with eccentric motion and different sanding disc diameters, as well as orbital sanders. "Every painting business works differently. This makes it difficult to recommend a specific one to choose. In general, I would give the following recommendation: For painting businesses that often perform drywall construction work, it is worth buying a long-reach sander. For smaller surfaces on walls and ceilings such as in guest toilets or in stairwells, I recommend the handy ETS EC 150/5 eccentric sander. For renovating windows with damaged old paintwork around the weatherboard, it is worth using a Rotex RO 90 geared eccentric sander. It has four different functions: Coarse and fine sanding, polishing and triangular sanding. The RUTSCHER RTS or DTS orbital sander is suitable for corners and smaller surfaces. For work outdoors or on scaffolding – without an available power source – a cordless compact sander is very practical," says Trainer Frey.
Woodwork: Proper door preparation
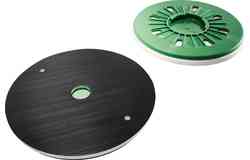
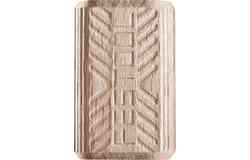
If historical doors which are worth preserving need to be prepared in order to maintain the special character of the house, if meticulous refurbishment is important in order to preserve the design of the door for many years to come, every door is one of a kind. Is the door in question an interior or an exterior door, an entrance that shapes the building's external appearance? If so, it's all the more important to think about the correct approach in advance. This often poses the question as to how much of the original material can be preserved. This is not only true of the doors, but of course of the frames as well. The doors are first examined, meaning old coats are checked and damaged areas in the wood are determined. The existing paint layers can be sanded smoothly and reliably with the ETS EC 150/5 or ETS EC 125 eccentric sander, to name a couple of tool recommendations. With the right speed, loose pieces are removed without too much pressure and intact surfaces are roughened. "We recommend that you use abrasives with a grit from P180 for water-based paint, and a grit from P150 for alkyd resin paint," explains application engineer Philipp Stahl. The DUPLEX LS 130 linear sander is ideal for profiles and recessed panels, as the linear sanding motion avoids deflections to the side. You also have the option of creating an individual sanding pad for all joint and profile shapes with the DIY construction kit. Sanding with the individual sanding pad is efficient and makes the job much easier. If necessary, hard-to-reach areas on profile grooves and transitions can be resanded using a particularly adaptable abrasive sponge. After lightly sanding the old paint, you can fill small holes and damaged areas. Of course, dust extraction is a must when lightly sanding. After sanding, you can vacuum the sanded surfaces thoroughly with a mobile dust extractor, and, if necessary, you can clean up with an anti-dust and tack cloth. For intermediate sanding with the ETS EC, we recommended using GRANAT abrasives with a grit of P240 to P500. The speed should be reduced to avoid sanding through or heating up the primed surface. If necessary, hard-to-reach areas on profile grooves and transitions can be resanded again using a manual abrasive.Renewed splendour for old windows. Renovating old window frames and casements made from wood to a professional standard is a challenging task. Renovating old window frames and casements made from wood to a professional standard is a challenging task. This is true in the conservation of cultural heritage as well as in the modern and sustainable handling of existing materials such as wood. Meticulous refurbishment with the appropriate expertise can make a window construction usable for many more years.
Sanding attractive railings
Many houses built in the period from the 1960s to the 1980s have stairwells, and sometimes a gallery area, featuring beautiful wooden railings. A linear sander is the ideal tool if the railing is to be left as it is and just brightened up. One of the few tools that offers pure linear motion in both directions is the DUPLEX LS 130. It is perfect for sanding wood material along the grain. The linear sanding motion does not deflect to the side, which is perfect for profiles such as handrails in stairwells or galleries. The DIY construction kit is particular clever in this regard, making it possible to create individual sanding pads for any profile, according to subsurface shape. This allows profiles for old radiators to be produced individually. Of course, metal railings can be treated in the same way.
You can find more information at www.festool.co.uk and on the Youtube channel Festool Quick Guides www.festool.com/quickguide-es-etsc