


How can substrates for floors be professionally prepared and what is there to watch out for? Festool technical expert Nadja Körbel gives tips for perfect substrate preparation.
For renovation or restoration jobs, work is usually carried out inside houses or apartments. Substrate preparation plays an important role, regardless of the customer's preferred covering or coating. Find out tips for substrate preparation for floors below.
Preparation work for floor renovations
The fundamental aspect to be aware of with old screed flooring is to make sure you completely remove all other coatings and vacuum it thoroughly before layering or further processing. If unevenness is compensated for with levelling compounds, the soaking of old material and the undercoat may mean that adhesion fails completely. As a result, the structure up to the adhesive is no longer stable. Other reasons include, for example, applying filler during the drying process, as well as movements in the wood or for homogeneous coatings. Floor layer and Festool training advisor Nadja Körbel has the following recommendation: "If there are cracks and unevenness in the screed, I recommend dealing with it professionally, otherwise rework and rectification costs may come about later. If a floating floor covering is preferred, a dry and firm yet flat surface is sufficient. Before laying, the surface is completely covered with a PE sheet, which protrudes for a few centimetres at the walls. In principle, it is recommended to remove all the remains of the old material completely – if only for hygiene reasons," explains Nadja Körbel.
General tips for removing old coverings and coatings
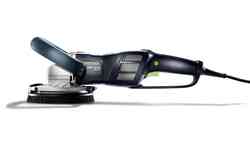
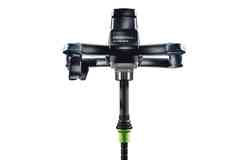
Restoration and renovation work often takes a long time to complete. Removing plaster, adhesive, paint or other coatings with a hammer drill or angle grinder is a rather laborious undertaking. Festool offers a more convenient solution in the form of its RENOFIX RG 130 surface-restoration grinder for removing old, stubborn adhesive residue, using a suitable milling disc in an efficient and, most importantly, low-dust manner. The RG 130 is a handy, powerful sander, which ensures results are virtually dust-free thanks to its spring mounted brush ring and patented extraction spiral. There are also two other RENOFIX machines: The RG 80 renovation miller is ideal for work on small and medium surfaces on the wall or overhead. With its broad range of accessories, the RG 150 renovation miller is perfect for fast progress on large surfaces – making it more suitable for floors.
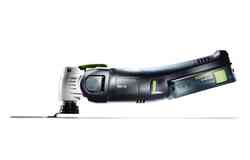
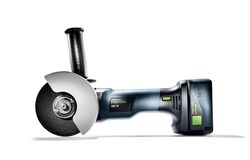
Treating screed cracks correctly
Floor layer Körbel recommends always closing screed cracks by rejoining broken parts with corrugated joining bars and epoxy resin. In many trades, angle grinders are normally used to prepare mineral building materials such as floor tiles, concrete, screed or drywall panels. Generally, this process generates a very high level of dust as cutting mineral materials creates a significant volume of fine dust. This poses health risks to anyone involved in the area. In order to avoid dust exposure during restoration work like this, Festool has developed the DSC-AG 125 FH freehand cutting system as a dust-free solution. With the cutting system – an angle grinder with a compact dust extraction attachment – cutting down and cutting out mineral building materials can be carried out virtually completely dust-free. In addition, the system allows a clear view of the cut. The folding hood even allows cuts to be performed right up to the wall. To achieve an efficient and dust-free cutting process, Nadia Körbel recommends combining the cutting system with the compatible CTM 36 E AC RENOFIX mobile dust extractor with automatic main filter cleaning system.
Tips for new screeds
For newly poured screeds, it is crucial to check the residual moisture content on the whole surface and the trim of the screed run after cleaning the sintered layer by sanding. There are different options here. This is determined professionally and safely with a CM measurement. Nadja Körbel adds: "It is important to deal with different substrates professionally, especially in the case of full-surface adhesives."
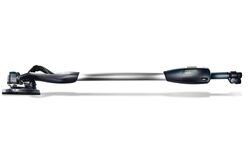
The right light reveals defects
Good lighting conditions are often neglected. Floor layer Körbel absolutely recommends a thorough inspection and assessment of the substrate – even before preparing a quote – since a surface that has not been carefully inspected may lead to surprises later down the line and a significant amount of rework. As a practical tip, the technical expert recommends using the SYSLITE STL 450 surface control light for the inspection. It optimally focuses the light, making it ideal for inspecting surfaces. The surface control light has variable height and inclination – with compatible tripod and long cable perfect for a large range of applications. Ultimately, the customer should be satisfied with the tradesperson's services because professional substrate preparation is a prerequisite for a perfect result – regardless of which floor coverings or coatings the customer chooses.
The RENOFIX RG 130 surface-restoration grinder is available from September 2021 in the new Systainer³ and can also be integrated into the bott vario3 vehicle equipment. In addition to these recommendations for floors, Festool also offers tips for substrate preparation on walls and/or ceilings.
More information is available at
Image Source: Festool GmbH