


How can substrates on walls and ceilings be professionally prepared and what is there to watch out for? Festool technical expert Philipp Stahl suggests tips for perfect substrate preparation.
For renovation or restoration jobs, work is usually carried out inside houses or apartments. Substrate preparation plays an important role, regardless of the customer's preferred covering or coating. Find out tips for substrate preparation for walls and ceilings below.
General tips for removing old coverings and coatings
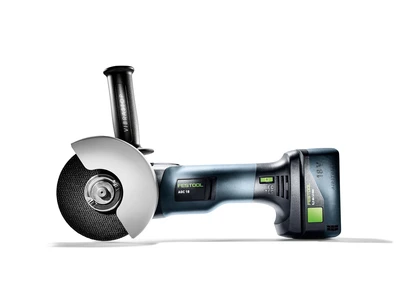
Restoration and renovation work often takes a long time to complete. Removing plaster, adhesive, paint or other coatings with a hammer drill or angle grinder is a rather laborious undertaking. Festool offers a more convenient solution in the form of its RENOFIX RG 130 surface-restoration grinder for removing old, stubborn coverings or coatings, using a suitable milling disc in an efficient and, most importantly, low-dust manner. The RG 130 is a handy, powerful sander, which ensures results are virtually dust-free thanks to its spring mounted brush ring and patented extraction spiral. There are also two other RENOFIX machines: The RG 80 renovation miller is ideal for work on small and medium surfaces on the wall or overhead. With its broad range of accessories, the RG 150 renovation miller is perfect for fast progress on large surfaces – making it more suitable for floors.
What applies to substrate preparation on walls and ceilings in particular
You rarely find ideal conditions on wall and ceiling surfaces. Therefore, they must be checked precisely and the necessary measures must be taken. Old wallpaper should be thoroughly and completely removed. Anyone wanting to work time- and cost-effectively uses wallpaper removers, which should be as solvent-free and odourless as possible. It facilitates quick penetration and easy removal of the old wall or ceiling covering. It is important to ensure here that wash-resistant wallpaper and painted woodchip is perforated beforehand. The Festool TP 220 wallpaper perforator is the perfect help here with its special working principle: Because of the rollers that are quickly rotating at different speeds, funnel-shaped openings are produced that let water optimally flow in behind the wallpaper and then penetrate into it. The depth adjuster is used to adjust the penetration depth of the rollers into the wallpaper to prevent damaging the wall, thereby protecting the substrate.
Substrate moisture content
Before starting the next work processes, the substrate must always be dry. Dark colouration on plaster or concrete surfaces and spots imply dampness, as well as mildew and mould stains. A plastic sheet test provides clear results here. After 12 to 24 hours, any residual moisture appears as condensate behind the plastic sheet. To check the absorbency on walls and ceilings, the test involving wetting with water is suitable: If the substrate quickly absorbs the water and the surface quickly colours or becomes dark, this indicates that the substrate is very absorbent. In this case, fine hairline cracks or craze cracks often become visible on the surface.
Checking surface stability and load capacity
A scratch test or pressure test can quickly determine surface stability. A hard, angular object is suitable to do this. If parts of the surface spall as a result of moderate pressure, the substrate is not stable enough for wallpaper and wall coverings. If a chalk-like coat comes away from the wall when you rub your hand on it, this substrate should be carefully cleaned and treated with a water-based wallpaper primer. The load capacity for old coverings from emulsion paints can be checked using an adhesive tape test. To do this, it is recommended to stick a piece of adhesive tape to the substrate, press it on firmly, then pull it off very quickly. If a large amount of paint particles adhere to the tape, it is recommended to remove the entire coat here too.
Removing old coatings
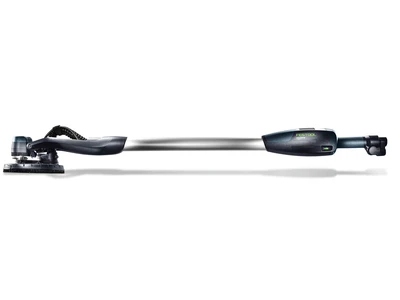
When renovating old houses or apartments, the sins and trends of the past often come to light, such as coarse Artex or decorative plaster, which have to be removed. A renovation miller helps with removal. "For areas on walls, we recommend the RG 80 RENOFIX combined with the SZ-RG 80 tool head. This is ideal for hard plaster, adhesive residues and synthetic resin plaster. For removing soft plaster with little structure to it, you can also use the PLANEX long-reach sander with a coarse abrasive paper," explains Philipp Stahl, master painter and application engineer at Festool. For substrate preparation on walls and ceilings, which were put in up to the 1970s, it is often the case that they are coated with distemper. These "sins of the past" should also be correctly and professionally removed prior to applying a new coat. Then, as emulsion paints came onto the market, the distemper was simply painted over. This lead to adhesion problems because the coating came away from the substrate. "At this point, I recommend thoroughly removing this layer of distemper using a brush and water, treating the surface with deep primer, filling in if necessary, and then applying the appropriate coating," says technical expert Stahl.
Dealing with dust
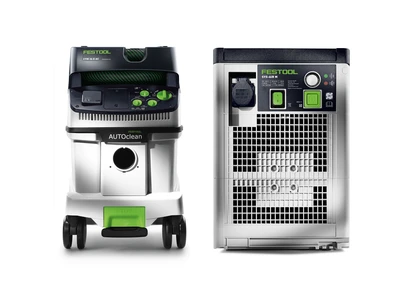
Removing old coatings on walls and ceilings also generates a great deal of dust. Here, Philipp Stahl recommends using the appropriate mobile dust extractor with dust class M. "For RENOFIX tools, the CTM 36 E AC RENOFIX mobile dust extractor is the best combination. If the plaster is finer, it can also be sanded with a coarse abrasive and the Planex long-reach sander – the Cleantec CT 36 AC Planex mobile dust extractor is ideal for that. If large amounts of dust are generated, the suction power improves immensely in combination with a CT-VA pre-separator on the mobile dust extractor."
The right light reveals defects
Good lighting conditions are often neglected. Master painter Körbel absolutely recommends a thorough inspection and assessment of the substrate – even before preparing a quote – since a surface that has not been carefully inspected may lead to surprises later down the line and a significant amount of rework. As a practical tip, the technical expert recommends using the SYSLITE STL 450 surface control light for the inspection. It optimally focuses the light, making it ideal for inspecting surfaces. The surface control light has variable height and inclination – with compatible tripod and long cable perfect for a large range of applications. Ultimately, the customer should be satisfied with the tradesperson's services because professional substrate preparation is a prerequisite for a perfect result – regardless of which coverings or coatings the customer chooses for their walls and ceilings.
The RENOFIX RG 130 surface-restoration grinder is available from September 2021 in the new Systainer³, and can also be integrated into the bott vario3 vehicle equipment. In addition to these recommendations for walls and ceilings, Festool also offers tips for substrate preparation on floors.
More information is available at
Image Source: Festool GmbH